This version of the guide is for ADCH++ versions 3.1.0 and later.
1. Introduction
ADCH++ is a hub server software for the ADC network. It is created as a reference implementation of the ADC protocol. The core application is very simple, but made highly extensible with plugins. The package includes a scripting plugin and scrpits that implement a full-featured hub and allow hub owners to further customize the hub using the Lua scripting language. The core is also exposed as a Python and a Ruby module, thus it is possible to use and embed it into a Python or Ruby application. ADCH++ is free software, released under the GNU General Public License, version 3.
2. Preface
This basic user guide shows you how to do the minimum configuration, setup and administration of an ADCH++ hub. It contains the basic information required for newbies.
3. Installing ADCH++ on your Operating System
This part describes the installation procedure of ADCH++ under Linux and Windows.
3.1. Installing on Windows
ADCH++ needs Windows 7 SP1 / 2008 Server or later to run. Since version 3.1.0 only x86-64 editions are supported.
ADCH++ release packages are available to download at the official home page at SourceForge (https://sourceforge.net/projects/adchpp/files). At the download page you can find the three ADCH++ distribution files:
-
Windows installer - a complete installer EXE file for Windows with uninstaller option.
-
ZIP package - contains the pre-compiled binaries (release build) for Windows with all the required scripts and configuration files.
-
Source code - an archive with the source code of the latest release distribution. You can use it to compile ADCH++ under other operating systems or for those who want to modify and compile the source themselves.
The easiest choice is the executable installer, when you start the installation you’ll go through the following steps:
-
Welcome Screen
-
Set up the installation Path:
|
|
on Windows you should install ADCH++ to the Program files directory only if you familiar with UAC Data Redirection and its effects. The simplest choice is to install/unpack ADCH++ files to another folder outside of Program Files where UAC rules don’t apply. A good alternative path is: c:\Users\<Your Username>\ |
As the last step of the installation procedure you’ll be asked if you want to install ADCH++ as a service or not. The main difference between installing ADCH++ as an applciation or as a service is that in application mode the ADCH++ console window will be always visible. This can be an advantage as you always able to ensure the hub is there, up and running and you can easily stop the hub anytime. On the contrary, as the console window cannot be closed (only minimized) it will always reside on your taskbar which can be annoying for some users. If ADCH++ is running in service mode then you won’t see any opened console window and outputs will go to the log file only. In this mode you can start and stop the hub in the Windows Service Management Console or using the appropriate shell commands. You can find more detailed information about running ADCH++ in service mode in the Expert User Guide.
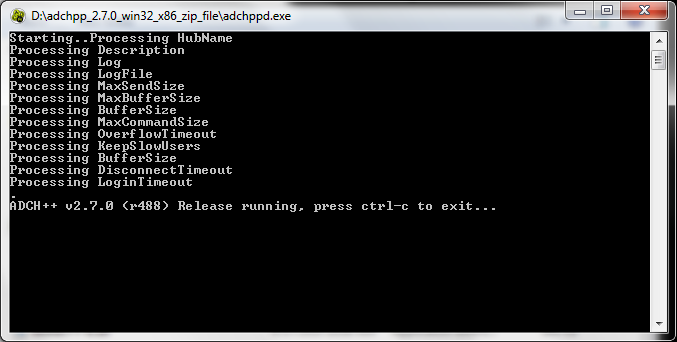
This is how the console output of a running release build looks
3.2. Installing on Linux
Installing on Linux/Unix operating systems requires a compilation of the source code as ADCH++ doesn’t come as an installable package. The procedure requires basic knowledge of shell scripting/usage for the default shell application that comes with the Linux distribution of your choice. You need a Linux distribution with at least 2.6-based kernel to run the compiled ADCH++ binary.
The source code is available via Sourceforge downloads (official releases) or from our Mercurial repository (current development version).
Download the latest released source code from https://sourceforge.net/projects/adchpp/files/
Download the latest development snapshot from the Mercurial repository at https://sourceforge.net/p/adchpp/code/ci/default/tree/
As a third option you can checkout the Mercurial repository by installing the Mercurial source control management tool client (should be available as a package called 'mercurial' in every major Linux distributions) and do the compile process from inside the local branch. This will also result correct revision information compiled into the ADCH++ executable. After installing Mercurial open a shell window and navigate to a path where you want to create a folder for the local branch and type:
hg clone http://hg.code.sf.net/p/adchpp/code adchppThis will result a copy of the development branch in a folder named adchpp in the current path where the command issued from.
The following tools needs to be installed to compile ADCH++ on a Linux/Unix machine:
| Package | Notes |
|---|---|
swig |
|
python |
(version 3.x.x) |
scons |
(version 4.0.0 or higher) |
gcc-c++ |
(version 4.4.x or higher, in some distros it is called build-essential which includes all the necessary build tools) |
libstdc++-devel |
(the package name may include a version number and/or the architecture in some distros) |
readline-devel |
(in some distros it is called differently like libreadline-dev, sys-libs/readline, etc…) |
openssl |
(needed for creating certificates only) |
openssl-devel |
(version 1.1.1 or 3.x.x) |
libssl-dev |
(in some distros it is libssh-dev) |
ruby (optional) |
(version 1.9.2 or higher, only needed for possible Ruby plugins, not used by default) |
If you have downloaded any of the zip archives then unpack the source code to a folder, open a shell prompt and navigate to the folder containing the source code. If you used Mercurial to fetch the source code then navigate to the root folder of your local branch. Inside the folder type:
scons mode=releaseOnce compiled without errors the resulting executable should reside in /build/release-default/bin/ or build/release-default-x64/bin/ folders, respectively. Before starting ADCH++ you should move the binaries and recommended to copy the default config files and scripts to folders with appropriate read/write/execute rights. You can find the default xml config files in the /etc folder of the source code tree. The Lua scripts that implement most hub features can be found in the plugins/Script/examples folder.
The following example sets up a scenario when you want to run the binary in the folder where they has been created by the compiler and make a copy of settings and scripts to right beside the binary.
[source,bat]
cd adchpp
scons mode=release
mkdir release-default/bin/config
mkdir release-default/bin/scripts
cp -rf plugins/Script/examples build/release-default/bin/scripts
cp -rf etc/ build/release-default/bin/config
cd build/release-default/bin/
/.adchppd -c ./config
For troubleshooting it can be a great help if you compile ADCH++ in debug mode. You can do so by issuing:
scons mode=debugThe debug build emits lots of information to the standard output console enabling easier detection of problems and their causes.
|
|
The build script compiles its own Lua engine version shipped with the package unless an exact same version it requires (currently version 5.1.4) is already installed in the system. In case of errors like the Lua engine doesn’t find its libraries you may need to specify the directory where you executing ADCH++ from or move the libs to a place where the engine searches them (e.g. /usr/local/lib/lua/5.1.4/). See a similar issue explained here. |
|
|
You can find a specific use case and instructions on how to build ADCH++ on Ubuntu LTS server here. |
4. Setting up your hub
This part focuses to the basic configuration of the hub describing how to manage and setup ADCH++ for operational use.
4.1. Basic configuration
ADCH++ is configurable using an XML settings file so are the standard plugins. In Linux, the default location for configuration files is "/etc/adchpp/". In Windows, it is a directory named "config" under the program directory. To have the config files elsewhere you can specify the config folder path using the -c switch of the executable file.
All ADCH++ settings are stored in a file called adchpp.xml. The default packaged example file (for Linux it’s in the /etc folder of the source code) contains lots of information to help you get started. Open up adchpp.xml in a text editor (such as Notepad on Windows) and start changing the values according to your needs.
|
|
Incorrect editing the file and settings values can lead to problems so be careful what you’re doing. If the settings file doesn’t meet the XML standards it may won’t be processed correctly. If you encounter errors try to validate the settings file syntax with an XML validator such as https://www.xmlvalidation.com |
| String | Purpose |
|---|---|
HubName |
Name of your hub |
Description |
Hub description |
Server |
Connection and port settings |
Plugins Path |
Path to plugins (must be changed on Linux only) |
Plugin |
List of plugin engines |
|
|
The default settings.xml file contains two <Plugins> opening tags, one for Linux (commented out, with path specification example) and another for Windows (default). Linux users should uncomment <!--Plugins Path="~/adchpp/"-→ by removing !-- and — and must modify the path to the actual plugins directory and remove or uncomment the standalone <Plugins> tag. Under Linux, just like for every other case for path’s, you must specify an absolute path. |
4.2. Setting up ports and interfaces
Add a new <Server/> entry to adchpp.xml with the port (and optionally a bind address of a network interface) you wish your hub to listen to. At a minimum you must add an entry similar to the following into the Servers part of the config file, between the <Servers> and </Servers> nodes.
[source,xml]
        <Servers>
                <Server Port="2113"/>
        </Servers>
In this example you will use the address adc://yourdomain:2113 in your DC client to log on to your hub.
|
|
The default adchpp.xml config file provided with the package lists all the available advanced options in the comments. |
4.2.1. Setting up a secure ADCS connection
To be able to connect to your hub in a secure encrypted way (ADCS connections), in the Server Port entry set TLS="1" and specify the following paths for certificate files: Certificate, PrivateKey, TrustedPath, DHParams.
|
|
Linux users should always use absolute path’s in this setting. |
An example of a Server setting for encrypted connections:
[source,xml]
        <Servers>
                <Server Port="2780" TLS="1" Certificate="certs/cacert.pem" PrivateKey="certs/privkey.pem"
                TrustedPath="certs/trusted/" DHParams="certs/dhparam.pem"/>
        </Servers>
In this example you will use the address adcs://yourdomain:2780 in your DC client to log on to your hub.
To make the secure encrypted TLS connectivity possible to your hub you must generate the three security certificate (.pem) files shown in the example above. You will need to install OpenSSL to generate these cert files. All the .pem files must be present in their specified paths in the <Server …> entry of the XML settings file to be able to make ADCS connections to the hub.
| Distribution | Command |
|---|---|
Windows |
|
Linux |
Install the openssl package (e.g apt-get install openssl) |
To automatically generate files and place them to the deafult path you can use the certificate files generator script (generate_certs.cmd or .sh depending on your OS) provided in the ADCH++ release package. Alternatively you can download the script for your operating system (Windows or Linux) from the ADCH++ code repository as well.
The script will create and automatically place the generated certificate files to a folder named certs under the ADCH++ program folder.
|
|
If you run the certificate files generator script under Windows it is recommended to install OpenSSL to its default folder. You may need to run the script in elevated mode (as Administrator). |
Alternatively you can generate the .pem files manually using the following commands:
[source,bat]
openssl genrsa -out privkey.pem 2048
openssl req -new -x509 -key privkey.pem -out cacert.pem -days 1095
openssl dhparam -outform PEM -out dhparam.pem 2048|
|
The above commands will generate a certificate that is valid for 3 years (1095 days). If you want longer validity period you can change the value of the -days switch (in the second command line of the above example) as desired. Note that generating certificate with much more years of validity is not recommended if you want reasonable security. |
|
|
Remember if you have specified TLS=1 in the server configuration, all users must connect to your hub using the protocol prefix adcs:// added to the hub address (adcs://yourdomain:port). You can open more than one ports for your hub by adding more <Server/> entries. You can even mix secure and unsecure (non-TLS) port connections by adding TLS=1 parameter to a particular <Server/> entry only. |
4.3. Script Management
Above the basic functions provided by the core ADCH++ relies on scripts performing various extended functions and commands (like handling registered users, login procedure, etc…). The hub software comes with prepackaged Lua scripts for handling basic hub functions and more. These (and any other) scripts can be configured using the Script.xml file located in the configuration folder of ADCH++.
The Lua scripts shipped with ADCH++ are configured to run by default. They should be always properly loaded to get the functionality described in the rest of this guide. If you want to use additional scripts then locate the Script.xml file and ensure that the scripts that you want to run are properly added to the existing ones.
[source,xml]
<?xml version="1.0" encoding="utf-8" standalone="yes"?>
<ScriptPlugin>
        <Engine language="lua" scriptPath="Scripts/">
                <Script>access.lua</Script>
                <Script>access.bans.lua</Script>
                <Script>access.guard.lua</Script>
                <Script>access.op.lua</Script>
                <Script>access.bot.lua</Script>
                <Script>history.lua</Script>
                <Script>texts.lua</Script>
        </Engine>
</ScriptPlugin>
Here’s how to disable a script in scripts.xml using the xml comment syntax:
[source,xml]
<?xml version="1.0" encoding="utf-8" standalone="yes"?>
<ScriptPlugin>
        <Engine language="lua" scriptPath="Scripts/">
                <Script>access.lua</Script>
                <Script>access.bans.lua</Script>
                <Script>access.guard.lua</Script>
                <Script>access.op.lua</Script>
                <Script>access.bot.lua</Script>
                <Script>adchpp-ptokax.lua</Script>
                <Script>history.lua</Script>
                <Script>texts.lua</Script>
        </Engine>
</ScriptPlugin>
Change to :
[source,xml]
<?xml version="1.0" encoding="utf-8" standalone="yes"?>
<ScriptPlugin>
        <Engine language="lua" scriptPath="Scripts/">
                <Script>access.lua</Script>
                <Script>access.bans.lua</Script>
                <Script>access.guard.lua</Script>
                <Script>access.op.lua</Script>
                <Script>access.bot.lua</Script>
                <Script>adchpp-ptokax.lua</Script>
                <Script>history.lua</Script>
                <!--Script>texts.lua</Script-->
        </Engine>
</ScriptPlugin>|
|
Linux users should use absolute paths pointing to the script folder in every <Script> entries. |
You have to use the +reload command or restart the hub for changes to take effect.
5. Additional configuration
There are additional settings and rules that can only be altered using hub commands. The hub settings are stored in a file called settings.txt. Ensure that this file exists in your configuration folder and its read/write accessible. If the file doesn’t exist (under Linux) then it’s best to create an empty file with the name above and appropriate rights before proceeding.
5.1. Account Creation
Registered users information are stored in a file called users.txt in your ADCH++ configuration folder. Ensure that this file can be read/write accessed by ADCH++. Now you can create your first admin account for your own hub.
The Lua scripts shipped with ADCH++ are responsible for providing hub features. They use numbers to specify various user profile levels. The available profile level range is from 1 to infinite. By default level 3 and higher users are operators so you have to choose at least level 3 or higher for your own administrator account. If you want to build a bigger user/operator hiearchy then make sure you choose high enough level (eg. 10) for your hub admin account.
There are two possible ways to create the first administrator account:
5.1.1. Create the admin account using the FirstReg.cmd shell script (Windows only)
You can use a small shell script to easily create your first admin account. The script called FirstReg.cmd and its provided in the release packages. To use it you must stop the hub before, then open up a Windows command prompt, navigate to and run the script from the ADCH++ program folder. Follow the onscreen instructions.
|
|
The FirstReg script is for creating the initial admin account ONLY. Its not usable to create subsequent accounts as it deletes all existing registrations before creating the initial account! |
If your account successfully created with the script you can skip the next chapter.
5.1.2. Create the admin account manually (all OSes)
To create an administrator super user account for yourself start up the hub, log on and enter the following command:
+regme <your desired password>[09-10-02][21:37:19] *** Connecting to adc://somehub.com:411
[09-10-02][21:37:19] *** Connected
[09-10-02][21:37:19] <ADCH++> MOTD content goes here
[09-10-02][21:37:56] <Testuser> +regme test
[09-10-02][21:37:26] <ADCH++> You're now registeredThis will create a level 1 registration. Now stop the hub by pressing Ctrl-C in the hub console window (or stop the service if you use service mode). In order to elevate this first registration as an administrator account you must open up the users.txt file in a text editor.
[{"password":"test","nick":"Testuser","level":1,"cid":"ABCDEFGHIJ1KLMNOPQRSTUVXYZA23BCDEFGHIJK"}]Change the user level to your desired admin level (eg. 10):
[{"password":"test","nick":"Testuser","level":10,"cid":"ABCDEFGHIJ1KLMNOPQRSTUVXYZA23BCDEFGHIJK"}]Save the file and start the hub.
5.1.3. Adding new user registrations as an administrator
Set up your newly created admin account in your ADC client software and reconnect to the hub. Now you have full access to all the administrator commands. You can register new administrators, operators and users below your level. Use the command:
+regnick <nick> <password> <level>You can create registrations / get information only for accounts with lower user level than you. This is true for users with subsequently lower level as well so you can easily specify the administators' hiearchy by registering operators between the operator level (3 by default) and the superuser level. You should register normal users with lower level than the operators (1 or 2).
-
registered user at the hub
-
registered vip user at the hub
-
registered as a basic op
-
…
You can list all (or a subset of) registered users with the +listregs command.
5.2. Administration Setup
This chapter shows you how to administer your hub using hub commands and settings.
5.2.1. Basic hub commands
A simplest way to show all the available commands and their descriptions is to use the +help command. To get information for a specific command use
+help <command>|
|
For <command> you can use partial names or abbreviations to get a list of available commands contaning the specified string in their names. |
Most commands are also available in the user menu of the connected ADC clients propagated as user commands. Here’s the list of the basic hub commands, those where mentioned are available for all users, the rest are for operators only.
| Command | Purpose |
|---|---|
+ban nick [reason] [minutes] |
Ban an online user. Use 0 for minutes to remove the ban. |
+bancid CID [reason] [minutes] |
Ban a CID. Use 0 for minutes to remove the ban. |
+banip IP [reason] [minutes] |
Ban an IP. Use 0 for minutes to remove the ban. |
+bannick nick [reason] [minutes] |
Ban a nick. Use 0 for minutes to remove the ban. |
+cfg name value |
Change hub configuration, use "+help cfg" to list all variables. |
+help [command] |
List all available commands, or display detailed information about one specific command. This command is available for everyone. |
+history [lines] |
Display main chat messages logged by the hub (empty lines means default / since last logoff) This command is available for everyone. |
+info [nick or CID or IP] |
Get information about a given user or, when issued without a parameter, about the hub statistics. This command is available for everyone. |
+kick user [reason] |
Disconnect the user, she can reconnect whenever she wants to. |
+listbans |
List the saved bans. |
+listregs [string] |
List the hub’s registered users, optional nick substring parameter for filtering results. |
+loadbans |
Reload the ban list. |
+mass message [min-level] |
Send a mass message to the specified user levels and higher. Empty parameter means send to everyone. |
+mute nick [reason] [minutes] |
Mute an online user. Use 0 for minutes to allow the user to talk again. |
+myip |
Show your IP. This command is available for everyone. |
+mypass new_pass |
Change your password, make sure you change it in your client options too. This command is available for everyone. |
+redirect nick <address> [reason] |
Redirect the user to the given address. Address must be enclosed by < and >. Reason is optional. |
+regnick nick [password] [level] |
Register a user; omit password and level to un-reg; level defaults to your own level minus one. |
+reload |
Reload scripts. |
+test |
Make the hub reply "Test ok". This command is available for everyone. |
+topic topic |
Change the hub topic (shortcut to +cfg topic). |
The above list contains the basic hub commands only. Many additional commands not listed here, e.g. those that belong to the advanced hub security and discussed later or in the Expert guide in detail.
5.2.2. Basic hub settings
To see what basic configuration parameters are available for your hub and what are their current values you should enter:
+help cfgTo change a basic hub setting you must use:
+cfg [setting] [value]| Setting | Purpose |
|---|---|
address |
Complete address of your hub with protocol URI and port number in adc[s]://[DNS or IP]:[port number] format (for hublist pingers) |
allownickchange |
Authorize registered users to connect with a different nick, 1 = allow, 0 = disallow |
allowreg |
Authorize un-regged users to register themselves with +mypass (otherwise, they’ll have to ask an operator), 1 = allow, 0 = disallow |
announcecfg |
Announce changes to hubname, description, topic, owner, website, network and limit settings in mainchat, 1 = enabled, 0 = disabled (aliases: announce) |
botcid |
CID of the hub bot, restart the hub after the change (in most cases you don’t need to change this) |
botdescription |
Description that shows in the userlist in the Description coloumn for the hub bot |
botemail |
Description that shows in the userlist in the E-mail coloumn for the hub bot |
botname |
The hub bot’s nickname |
description |
Your hub’s description (for hublist pingers) |
failover |
Comma separated list of failover address(es) for the hub in adc(s)://address:port,… format, empty = disabled (aliases: failoveraddress) |
history_connect |
How much lines of the main chat history the hub displays to the user on connect, 0 = disabled |
history_default |
How much lines of the main chat history the hub displays for the +history command |
history_max |
Maximum amount of last main chat history lines that the hub saves |
history_method |
Strategy used by the +history command to record messages, restart the hub after the change, 1 = use a hidden bot, 0 = direct ADCH++ interface |
history_prefix |
Format of the timestamp to put before every message in the history. For the avaliable formatting parameters check the General time format variables in the Logs part of the DC++ help file or the same document online at https://dcplusplus.sourceforge.io/webhelp/settings_logs.html |
maxusers |
Maximum number of non-registered users to log in, -1 = no limit, 0 = no unregistered users allowed (private hub) |
menuname |
Name of the main user menu for the hub’s user commands (displayed in the clients) |
minchatlevel |
Minimum user level to be able to chat, 0 = disabled (hub restart recommended after change) - see also minmainchatlevel |
mindownloadlevel |
Minimum user level to be able download, 0 = disabled (hub restart recommended after change) |
minmainchatlevel |
Minimum user level to be able to chat except for PMs, 0 = disabled - see also minchatlevel |
minsearchlevel |
Minimum user level to be able to search, 0 = disabled (hub restart recommended after change) |
name |
Name of the hub (for hublist pingers) |
network |
Name of the network the hub belongs to (for hublist pingers) |
oplevel |
Minimum user level for operators, all users >= this level will have OP rights (hub restart recommended after change) |
owner |
Hubowner’s name (for hublist pingers) |
passinlist |
Show passwords of users with lower level than you using the +listregs command, 1 = show, 0 = don’t show (enable only if you have trust in your lower level operators) |
rulesredirect |
Redirect address to use when rules like slots/hubs/sharesize aren’t obeyed, empty = users will be disconnected only |
sendversion |
Print hub version information at login and in the stats info 1 = enabled, 0 = disabled |
topic |
Sets the hub topic: if set, overrides the description for normal users; the description is then only for use by hublists pingers |
website |
Sets the website for your hub network or hub (for hublist pingers) |
5.3. Setting up texts for "about" / "message of the day" / "rules"
It is possible to set up cretain kinds of usual textual information to be shown to the user. These texts registered within the "texts.lua" script can:
-
Appear when users connect.
-
Be accessed via user commands (contextual menu or "+commands" such as "+rules").
By default, three types of the most common texts are added to the script. To make them work, you’ll need the following files in your configuration folder:
| File name | Command to display contents |
|---|---|
about.txt |
+about |
motd.txt (for "message of the day") |
+motd |
rules.txt |
+rules |
The contents of the files should be the texts shown to users. When and how will these texts appear can be configured by a list of data structures defined inside the script. Open texts.lua script file in a text editor and search for "Store the texts and their settings here". Setting up things should be self-explanatory.
|
|
Want to have more kinds information to be displayed by a command in your hub? Just insert as many more config structures as you want after the default ones in texts.lua. Don’t forget to reload the scripts for the changes to take effect! |
5.4. FAQ
This chapter help you setup your hub by answering the most frequent questions. For additional FAQs visit: https://answers.launchpad.net/adchpp/+faqs
5.4.1. How can I set up my hub to private so only registered users are able to log in?
+cfg maxusers 0The setting "maxusers" has the following description:
maxusers - maximum number of non-registered users, -1 = no limit, 0 = no unregistered users allowedWhen the hub is set to registered users only the connecting unregistered users will receive the following message:
[09-10-02][22:07:09] <ADCH++> Only registered users are allowed in here5.4.2. How can I setup so only registered users are able to chat/search/download?
It’s possible to restrict guest (unregistered) users to be able to chat/search/download until they get registered by an operator or until they use the self registraton command:
+regme <password>Since ADCH++ version 2.5.1 setting up download/chat/search rules is pretty easy. You are just a few simple commands away to set these rules up. You have to specify what is the minimum userlevel needed to be able to do different things. Zero value means the function is available to all users.
+cfg minchatlevel <value>
+cfg mindownloadlevel <value>
+cfg minmainchatlevel <value>
+cfg minsearchlevel <value>-
minchatlevel - minimum level to chat - hub restart recommended - see also minmainchatlevel
-
mindownloadlevel - minimum level to download - hub restart recommended (aliases: mindllevel, mintransferlevel)
-
minmainchatlevel - minimum level to chat except for PMs - see also minchatlevel
-
minsearchlevel - minimum level to search - hub restart recommended
5.4.3. How can I modify the password and user level of an already registered user?
You simply re-register the user with the new password and user level. You must specify the password even if you’re willing to change the level only. This means that you’re also able to change the password and the level of the user at the same time.
+regnick <user> <password> <new level>5.4.4. Why are different registered accounts unable to log in to the hub with the same DC client?
Unlike the former Direct Connect protocol NMDC, which identifies users by their nicks, ADC protocol identifies hub users by their DC clients using a client assigned ID (CID). The user authentication in ADCH++ works in the similar manner; once users registered by their nick log in for the first time, their CID is registered and subsequent logins will use the CID + password combination to authenticate the users. By default this allows multiple users with the same nick to log in but will prevent multiple accounts to log in with the same DC client. Therefore currently it is not possible for a user with one DC client to have multiple accounts on an ADCH++ hub. This means that for a real world example an administrator cannot check whether users are able to log in with their accounts, etc… with their DC client used for the hub administration. A workaround for these cases is to use multiple DC clients for multiple user accounts.
6. More information
If you want to know more about ADCH++
-
There is an expert user guide available for advanced/expert users. It contains information about advanced scripting, resource usage scaling, extended hub security settings as well as topics about compiling, testing, bug reporting or contributing to the ADCH++ project. The Expert Guide is available at https://adchpp.sourceforge.io/user_guide/expert_guide.html The latest revisions of both user guides (corresponding to the current development revision) are also available in the ADCH++ repository at https://sourceforge.net/p/adchpp/code/ci/default/tree/
7. User support
-
You can get support for ADCH++ at the project’s official Answers tracker at Launchpad.
-
You can get more help, information or discuss topics about ADCH++ at the DCBase.org community portal forums or by logging on to the DC Development hub at adcs://hub.dcbase.org:16591.
8. Appendix
This document is published under GNU FDL
Copyright (c) 2010-2025 Jacek Sieka
Permission is granted to copy, distribute and/or modify this document under the terms of the GNU Free Documentation License, Version 1.3 or any later version published by the Free Software Foundation; with no Invariant Sections, no Front-Cover Texts, and no Back-Cover Texts. A copy of the license is available at https://www.gnu.org/copyleft/fdl.html